Getting started: A skeleton application
In order to build our application, we will start with the ZendSkeletonApplication available on github. Use Composer (http://getcomposer.org) to create a new project from scratch with Zend Framework:
1 | php composer.phar create-project --stability="dev" zendframework/skeleton-application path/to/install
|
Note
Another way to install the ZendSkeletonApplication is to use github. Go to
https://github.com/zendframework/ZendSkeletonApplication and click the “Zip”
button. This will download a file with a name like
ZendSkeletonApplication-master.zip or
similar.
Unzip this file into the directory where you keep all your vhosts and rename the
resultant directory to zf2-tutorial.
ZendSkeletonApplication is set up to use Composer (http://getcomposer.org) to resolve its dependencies. In this case, the dependency is Zend Framework 2 itself.
To install Zend Framework 2 into our application we simply type:
1 2 | php composer.phar self-update
php composer.phar install
|
from the zf2-tutorial folder. This takes a while. You should see an output like:
1 2 3 4 5 | Installing dependencies from lock file
- Installing zendframework/zendframework (dev-master)
Cloning 18c8e223f070deb07c17543ed938b54542aa0ed8
Generating autoload files
|
Note
If you see this message:
1 2 | [RuntimeException]
The process timed out.
|
then your connection was too slow to download the entire package in time, and composer timed out. To avoid this, instead of running:
1 | php composer.phar install
|
run instead:
1 | COMPOSER_PROCESS_TIMEOUT=5000 php composer.phar install
|
Note
For windows users with wamp:
Install composer for windows Check composer is properly installed by running
1
composer
Install git for windows. Also need to add git path in windows environment variable Check git is properly installed by running
1
git
Now install zf2 using command
1
composer create-project -s dev zendframework/skeleton-application path/to/install
We can now move on to the web server setup.
Using the Apache Web Server
You now need to create an Apache virtual host for the application and edit your
hosts file so that http://zf2-tutorial.localhost will serve index.php from the
zf2-tutorial/public directory.
Setting up the virtual host is usually done within httpd.conf or
extra/httpd-vhosts.conf. If you are using httpd-vhosts.conf, ensure
that this file is included by your main httpd.conf file. Some Linux distributions
(ex: Ubuntu) package Apache so that configuration files are stored in /etc/apache2
and create one file per virtual host inside folder /etc/apache2/sites-enabled. In
this case, you would place the virtual host block below into the file
/etc/apache2/sites-enabled/zf2-tutorial.
Ensure that NameVirtualHost is defined and set to “*:80” or similar, and then
define a virtual host along these lines:
1 2 3 4 5 6 7 8 9 10 11 | <VirtualHost *:80>
ServerName zf2-tutorial.localhost
DocumentRoot /path/to/zf2-tutorial/public
SetEnv APPLICATION_ENV "development"
<Directory /path/to/zf2-tutorial/public>
DirectoryIndex index.php
AllowOverride All
Order allow,deny
Allow from all
</Directory>
</VirtualHost>
|
or, if you are using Apache 2.4 or above:
1 2 3 4 5 6 7 8 9 10 | <VirtualHost *:80>
ServerName zf2-tutorial.localhost
DocumentRoot /path/to/zf2-tutorial/public
SetEnv APPLICATION_ENV "development"
<Directory /path/to/zf2-tutorial/public>
DirectoryIndex index.php
AllowOverride All
Require all granted
</Directory>
</VirtualHost>
|
Make sure that you update your /etc/hosts or
c:\windows\system32\drivers\etc\hosts file so that zf2-tutorial.localhost
is mapped to 127.0.0.1. The website can then be accessed using
http://zf2-tutorial.localhost.
1 | 127.0.0.1 zf2-tutorial.localhost localhost
|
Restart Apache.
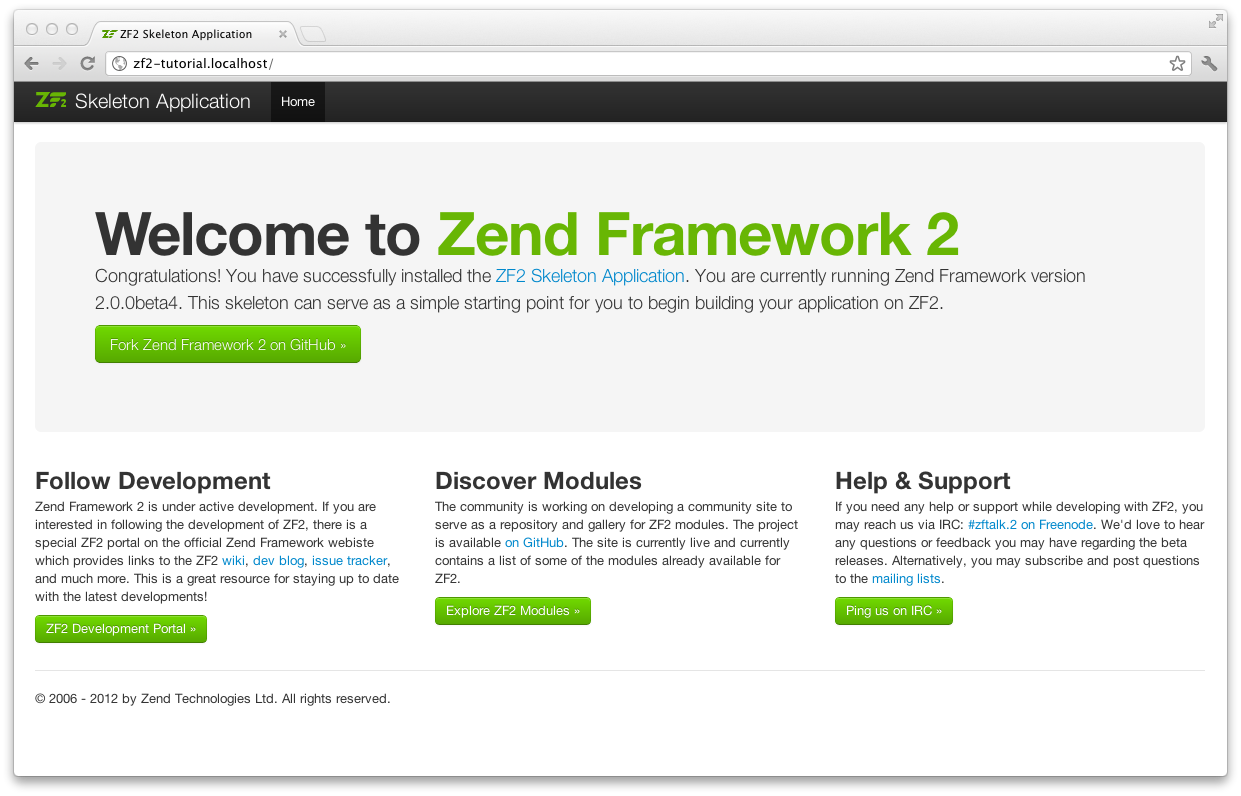
If you’ve done it correctly, it should look something like this:
To test that your .htaccess file is working, navigate to
http://zf2-tutorial.localhost/1234 and you should see this:
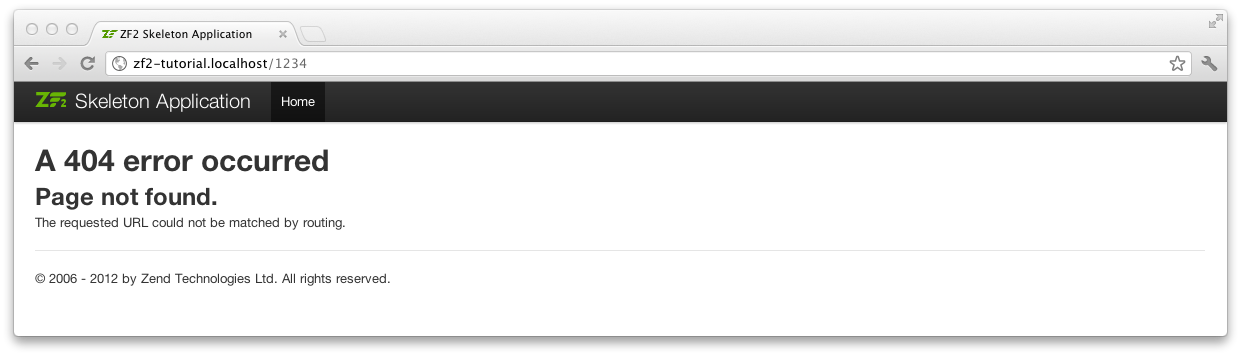
If you see a standard Apache 404 error, then you need to fix .htaccess usage
before continuing. If you’re are using IIS with the URL Rewrite Module, import the following:
1 2 | RewriteCond %{REQUEST_FILENAME} !-f
RewriteRule ^ index.php [NC,L]
|
You now have a working skeleton application and we can start adding the specifics for our application.
Using the Built-in PHP CLI Server
Alternatively — if you are using PHP 5.4 or above — you can use the built-in CLI server (cli-server). To do this, you just start the server in the root directory:
1 | php -S 0.0.0.0:8080 -t public/ public/index.php
|
This will make the website available on port 8080 on all network interfaces, using
public/index.php to handle routing. This means the site is accessible via http://localhost:8080
or http://<your-local-IP>:8080.
If you’ve done it right, you should see the same result as with Apache above.
To test that your routing is working, navigate to http://localhost:8080/1234 and you should see the same error page as with Apache above.
Note
The built-in CLI server is for development only.
Error reporting
Optionally, when using Apache, you can use the APPLICATION_ENV setting in
your VirtualHost to let PHP output all its errors to the browser. This can be
useful during the development of your application.
Edit index.php from the zf2-tutorial/public/ directory and change it to
the following:
1 2 3 4 5 6 7 8 9 10 11 12 13 14 15 16 17 18 19 20 21 22 23 24 25 26 | <?php
/**
* Display all errors when APPLICATION_ENV is development.
*/
if ($_SERVER['APPLICATION_ENV'] == 'development') {
error_reporting(E_ALL);
ini_set("display_errors", 1);
}
/**
* This makes our life easier when dealing with paths. Everything is relative
* to the application root now.
*/
chdir(dirname(__DIR__));
// Decline static file requests back to the PHP built-in webserver
if (php_sapi_name() === 'cli-server' && is_file(__DIR__ . parse_url($_SERVER['REQUEST_URI'], PHP_URL_PATH))) {
return false;
}
// Setup autoloading
require 'init_autoloader.php';
// Run the application!
Zend\Mvc\Application::init(require 'config/application.config.php')->run();
|
